Pico(Visual Studio Code)Windows環境設定(Python言語)
今回は、Raspberry Pi Pico の開発環境として、
Visual Studio Code での Python言語 環境を設定してみます。
Visual Studio Code にPython言語環境が設定されている
前提で進めます。
この環境設定は、
・WindowsでPython環境設定(その1)
https://shinog.jp/computer/windows%e3%81%a7python%e7%92%b0%e5%a2%83%e8%a8%ad%e5%ae%9a%ef%bc%88%e3%81%9d%e3%81%ae%ef%bc%91%ef%bc%89/
・WindowsでPython環境設定(その2)
https://shinog.jp/computer/windows%e3%81%a7python%e7%92%b0%e5%a2%83%e8%a8%ad%e5%ae%9a%ef%bc%88%e3%81%9d%e3%81%ae%ef%bc%92%ef%bc%89/
に記載しています。
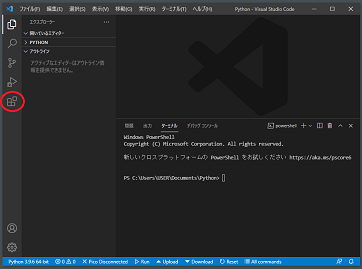
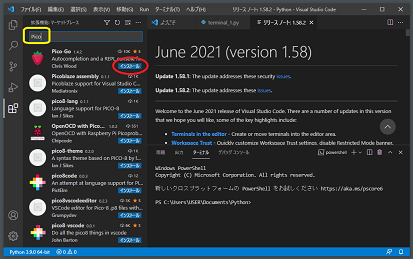
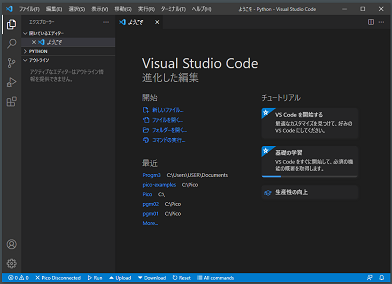
1.Visual Studio Code を起動します。
左にあるアイコンメニューから、
拡張機能(四角の箱四つ)を選択します。
2.表示された拡張機能欄の検索欄(一番上部)に、
"Pico"を入力します。
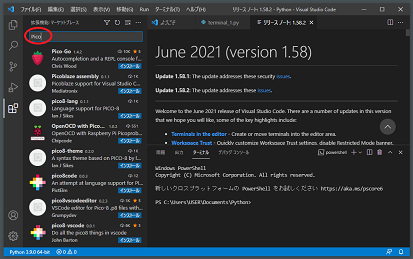
3.表示された一覧の中から、
"Pico-Go"を選択し、「インストール」をクリックします。
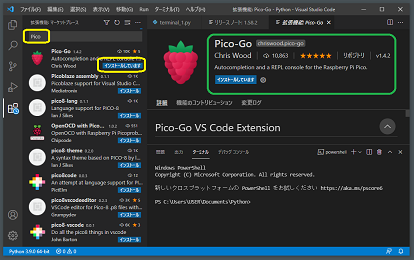

これで環境設定は完了です。
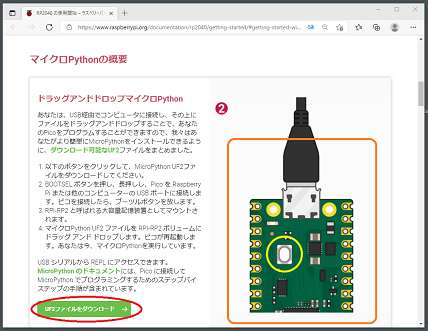
Picoで、MicroPythonを使用する場合、
公式の"はじめマイクロパイソン"のページの
"マイクロPythonの概要"
https://www.raspberrypi.org/documentation/rp2040/getting-started/#getting-started-with-micropython
を参考に、
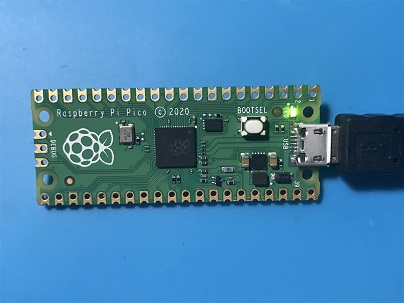
"UF2ファイルをダウンロード"からダウンロードし、
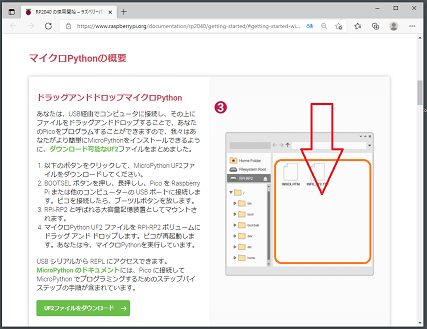
Pico本体の"BOOTSEL"ボタンを押しながら、PCと接続し、
ストレージとして認識されているPicoに転送
(ドラッグ アンド ドロップ)しおきます。
では、簡単なプログラミングをしてみます。
※定番の基板上のLEDの点滅です。
1.プログラムの保存用フォルダを作成しておきます。
※私の場合:"C:\Users\USER\Documents\Python1"
2.Visual Studio Code を(再)起動します。
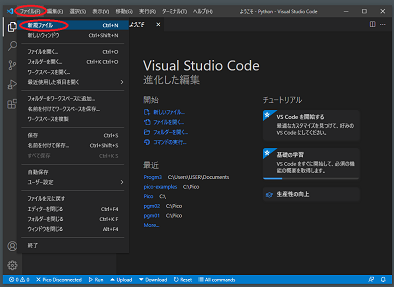
3.新規ファイルを作成します。
メニュー「ファイル(F)」→「新規ファイル (Ctrl+N)」
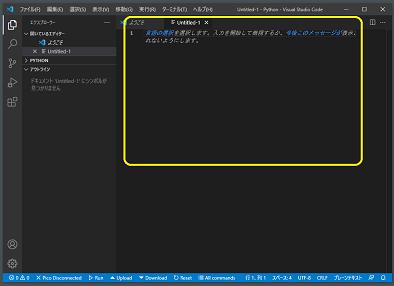
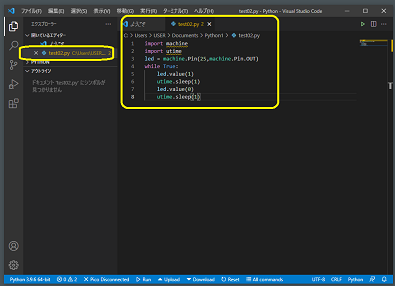
4.表示された、"Untitled-1"ファイルに
プログラム記述します。
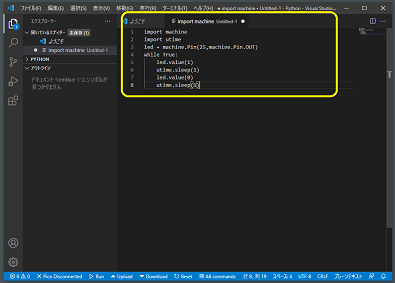
※基板上のLEDの点滅プログラム例です。
import machine
import utime
led = machine.Pin(25,machine.Pin.OUT)
while True:
    led.value(1)
    utime.sleep(1)
    led.value(0)
    utime.sleep(1)
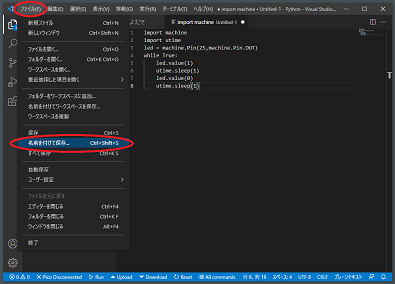
5.記述したプログラムファイルを保存します。
メニュー「ファイル(F)」
→「名前を付けて保存…(Ctrl+Shift+S)」
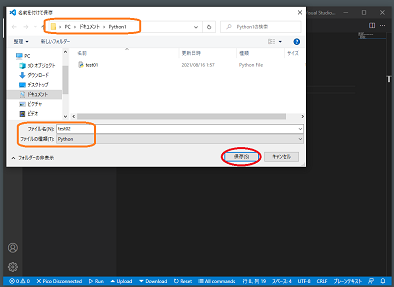
名前を付けて保存画面で、
保存フォルダ:"C:\Users\USER\Documents\Python1"
ファイル名:test02
ファイルの種類:Python
と設定し、「保存」ボタンをクリックします。
※各設定は私の場合です。
※これ以降の操作には、
PC と Pico の接続が必要になります。
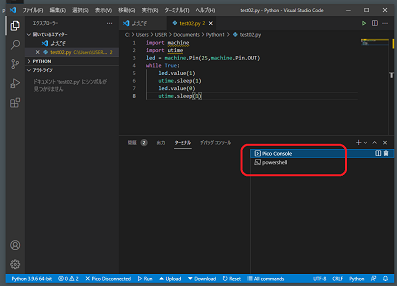
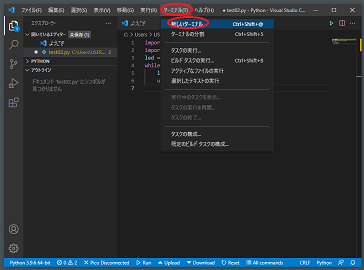
6.Pico Console ターミナルを選択します。
右下窓にターミナルタブが表示されている場合、
そのターミナルの種類から
"Pico Console"を選択します。
ターミナル窓の表示がされていない場合、
メニュー「ターミナル(T)」
→「新規ターミナル(Ctrl+Shify+@)」で表示します。
※"Pico Console"が表示されていない場合は、
PCとRaspberry Pi Picoの接続をし直したり、
Visual Studio Code を再起動してみます。
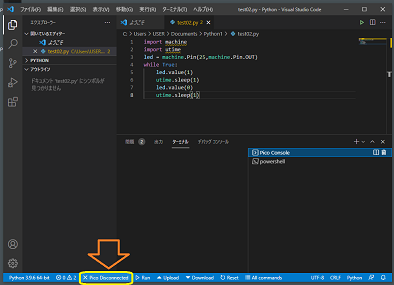
7.Picoとコネクトします。
一番下の青いライン表示内の 、"X Pico Disconnected" をクリックします。
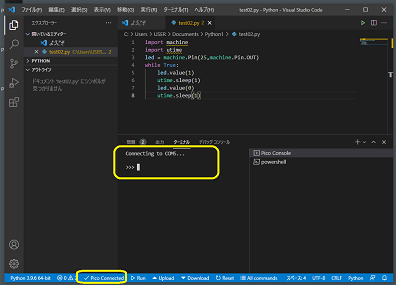
コネクトに成功すると "✓ Pico connected "と表示が変わり、
ターミナル窓には、
>>>
と表示されます。
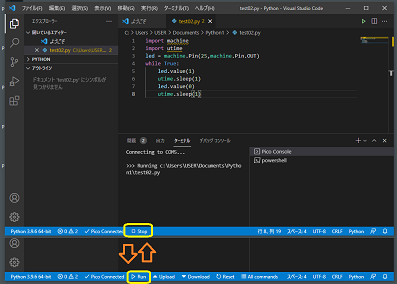
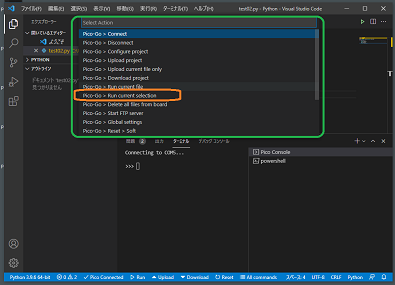
8.転送し実行します。
一番下の青いライン表示内の 、"All commands" をクリックします。
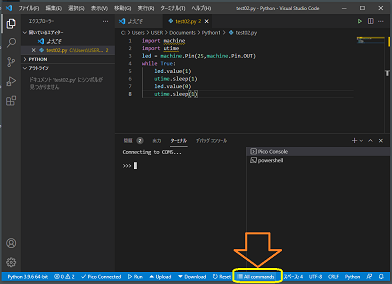
表示された "Select Action" メニューより、
"Pico-Go > Run current file"
を選択します。
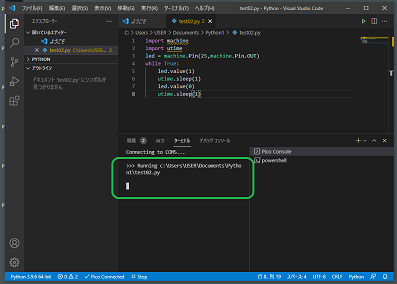
Pico基板上のLEDが点滅します。
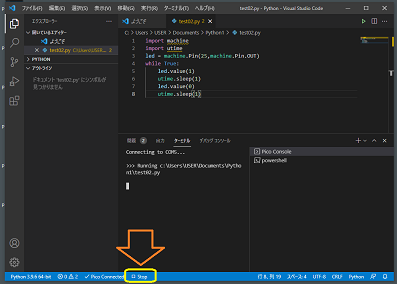
9.実行を停止します。
一番下の青いライン表示内の 、"□ Stop" をクリックします。
表示が "▷ Run" に変わり、Pico基板上のLEDの点滅が停止します。
これで、環境設定と動作確認は完了です。
※プログラムを変更して再実行するような場合は、
Visual Studio Code がそのまま起動状態で、
PC と Pico との接続もそのままの状態であれば、
一番下の青いライン表示内の、"Stop" "Run" で継続操作できます。